Happy Holidays!
I hope everyone has a great holiday, whatever holiday you celebrate. May it be safe and peaceful, whatever part of the world you are in. May it be everything you hope and wish for.
Thursday, December 25, 2008
Thursday, December 18, 2008


Black Bean Soup

Dinner tonight was black bean soup. Just something I threw together, but it turned out very tasty, so I thought I would post it here.
Black Bean Soup
1 can black beans, drained and rinsed.
1 can stewed tomatoes
1 can corn
4 chicken breast fillets, cut into bite size pieces
1 cup frozen mixed veggies, or a small can of Vegall
1 onion diced
4 gloves of garlic (or to taste), minced
1 chicken bouillon cube
water
salt and pepper to taste
in a large pot, sweat the onions and garlic in a small amount of oil. add the chicken and all the canned vegetables. add water to cover by 1 inch and toss in the bouillon cube. bring to a boil, reduce to a simmer. serve hot with cornbread.
I actually never have canned beans on hand, I always have dried. So I used 1 cup of dried beans, cooked in about 2 quarts water, no seasoning. When the beans are tender, drain and rinse, and follow the rest of the directions.
Wednesday, December 17, 2008
Deeply Dark Devils Food Cake
MMMMMM.... cake. I love cake. I love chocolate. So when I was asked to bake a cake for my friend Ashlynne's birthday, who also loves chocolate, I knew this was the cake I had to bake. I used Hershey's Special Dark Cocoa powder and it was beyond deeply dark. It was black... and rich. I frosted it with a chocolate butter cream that I made with coffee instead of milk. This cake is so dark, it sucks up the light, so rich it could buy you a car. Serve it at room temperature to get the full creaminess of the frosting. It got eaten before I was able to take pictures, but I plan on making it again soon.
Deeply Dark Devils Food Cake
Makes 1 tall 9 inch cake layer
1 3/4 cup all purpose flour
2 teaspoons baking powder
3/4 teaspoons baking soda
3/4 teaspoons salt
11 tablespoons unsatled butter, softened
1 1/2 cips granulated sugar
2/3 cup dutch process cocoa
2 large eggs
1 teaspoon vanilla extract
1 1/3 cup warm water
1 recipe "Especially Dark" Chocolate Frosting (recipe at the end)
Position rack in the cent or the oven and preheat the oven to 325 degrees. Grease the bottom and sides of a 9x3 inch spring form pan (make sure that the pan has a tight-fitting bottom, to prevent the batter from leaking.). Dust the pan with flour.
Sift together the flour, baking powder, baking soda, and salt into a medium bowl. Whisk until well blended, and set aside.
In the bowl of an electric mixer, using the paddle attachment, beat the butter at medium speed until creamy, about 1 minute. Gradually add the sugar and beat at high speed until the mixture is pale and well, blended, about 3 minutes. Add the cocoa powder and beat at medium speed for 1 minute, scraping down the sides of the bowl with a rubber spatula as necessary. Beat in the eggs one at a time, beating well after each addition. Beat in vanilla extract. At low speed, add the flour mixture in three additions, alternating it with the warm water in two additions. Scrape down the sides of the bowl and mix at low speed for 30 seconds. Pour batter into the prepared pan and smooth the top.
Bake the cake for 45 to 55 minutes for the full recipe, until a cake tester inserted into the center of the cake comes out clean. Cool the cake in the pan on a wire rack for 20 minutes.
Remove the sides of the pan and invert the cake onto the rack. Remove the bottom of the pan and let cake cool completely.
With a long,serrated knife (I used a bread knife), slice the cake in half horizontally to make two layers. Using 1/3 of the chocolate butter cream, spread onto the top of the bottom layer. Place the other layer on top. Frost the top and sides with the remaining frosting.
"The Cake Book" by Tish Boyle copyright 2006
"Especially Dark" Chocolate Frosting
1/2 cup (1 stick) butter, softened
2/3 cup Hershey's Special Dark Cocoa
3 cups powdered (confectioner or icing, depending on where you live)sugar
1/3 cup milk (I used strong coffee, make sure it's completely cool)
1 teaspoon Vanilla
Melt the butter. Stir in cocoa. Alternately add powdered sugar and milk, beating to spreading consistency. Add small amount of additional milk if needed. Stir in vanilla. About 2 cups frosting.
from the back of the Hershey's Special Dark Cocoa box.
Monday, December 15, 2008
Holidays
No recipe tonight, I'm feeling very sentimental and sappy. You see, I suffer from severe depression and the holidays are the worse time for me. This is the first time I've put up a tree in 3 or 4 years. It's just me and mom now, unlike the Christmas's when I was a kid. I come from a large, Catholic, Cajun family, so Christmas celebrations usually involved everyone from first cousins to third and fourth cousins, as well as all the step family. We're talking close to 100 people all crammed into my grandmothers little house in Baton Rouge. I really miss my family sometimes and wish we could all be together through the holidays. I especially miss my brothers and sisters. I am however very blessed with the very best group of friends a person could have. They have really helped me through some hard times and I love them with all my heart. Without them I don't know that I would have made it these past few years and I hope they know how much I appreciate their love and support. Because of them, this year's Christmas doesn't seem so bad emotionally, hence, the Christmas tree and the feeling that maybe life isn't so bad.
So here is my little tree!!

Here it is with all the lights turned off.

Some of my favorite ornaments.


Mietze helping me decorate.

So here is my little tree!!

Here it is with all the lights turned off.

Some of my favorite ornaments.


Mietze helping me decorate.

Friday, December 5, 2008
Cooking
I have had a nasty stomach virus all week long, so needless to say, there hasn't been much cooking going on at my house. If it weren't for Campbells pull tabs on their soups, I probably wouldn't have eaten at all this week. I love chicken soup, so I was happy about that. I would have preferred to have had my own homemade chicken soup, but alas, I had none in the freezer, nor did I have the energy or where-withal to make any. So, though I have no pictures, I will post my chicken noodle soup recipe anyway. It really is quick and easy. Unless you've got your head in a toilet going "MOOOOMMMMM!!! I'M SICK!!!"
Chicken Noodle Soup
1 1/4 piece of fresh ginger
1 box of no salt added chicken broth.
2 Boneless, skinless chicken thighs or breasts
1 carrot, peeled and slice into 1/4 rounds
1 stalk celery, sliced into 1/4 pieces
1/2 cup uncooked egg noodles
salt and pepper to taste
In a 2 quart heavy bottomed pot, put the ginger and broth. Bring to a boil and simmer for 10-15 minutes, or until it's as gingery (is that a word??) as you would like it to be. Add in the rest of the ingredients and simmer until chicken and noodles are cooked and the carrots are tender-crisp.
Thursday, November 27, 2008
Happy Thanksgiving
Hope everyone had a happy holiday! Sorry for not posting this week, I will be posting again regularly next week.
Thursday, November 20, 2008
Turducken

From the simplest of foods to one of the most complicated dishes I can think of,Turducken. "But Jal, what in the world is Turducken??" you may ask. Well, gentle readers, sit right down and I'll tell you.
Turducken is a monument to Cajun culinary ingenuity and gastronomical economy. It is a turkey, stuffed with a duck, stuffed with a chicken stuffed with, well, stuffing. I have never made a turducken. Just reading the recipes gives me a headache! I am however, thinking that I could attempt it using just breasts. I hate to think about deboning all those large birds. Not to mention the time it would take, not only to prepare, but the actual cooking time!! I would highly recommend just buying one. The most famous of course is Hebert's (and that is pronounced "AY-bears", NOT "HE-berts"), but if you just Google "turducken", you'll find several places that sell it. Most prices start at around $65.00 and go from there, depending on size. What will get you though, is the shipping price. Total price, for a turducken from Heberts, is $115 using UPS ground, $129 for 2 day UPS, and $158 for next day UPS. Or you can bite the bullet, and make your own. The following is the recipe credited to Paul Prudhomme. The dressing recipes are at the end. Have fun with it!
**Is it wrong that the needed equipment is a hammer???
Turducken
Ingredients for assembling the Turducken:
* 4 recipes Andouille Smoked Sausage Dressing
* 2 recipes Cornbread Dressing
* 4 recipes Oyster Dressing
* One 20 to 25 pound turkey
* One 4 to 5 pound domestic duckling
* One 3 to 3-1/2 pound young chicken
* About 7 tablespoons Creole seasoning or Chef Prudhomme's commercially packaged Cajun Poultry Magic seasoning
* 5 recipes Sweet Potato Eggplant Gravy
Tools needed:
* One small hammer
* One 3-inch needle; a "packing" needle with a curved tip works well
* One 15x11 inch baking pan, at least 2-1/2 inches deep
* One pan, larger than the 15x11 pan, that the smaller pan will fit inside with room to spare
Make the three dressings, then refrigerate.
Boning the fowl
It's helpful to keep the following in mind:
1. Your goal is to end up with one large piece of essentially boneless turkey meat; the finished product will contain only the tip end of each leg bone and the first two joints of each wing. You will end up with one piece of completely boneless duck meat, and one piece of completely boneless chicken meat.
2. Be careful not to pierce the skin except for the initial slits. Cuts in the skin tend to enlarge during cooking and make the end result less attractive, as well as more dry.
3. Allow yourself plenty of time, especially if you're a beginner. And even if you're experienced, approach the boning procedure with a gentle, careful touch -- the meat is not tough and you want to end up with as much of it as possible.
4. Bone one side of each bird -- either the left or the right -- before doing the other side.
5. Use a sharp boning knife and use mainly the tip; stay close to the bone at all times with the knife. 6. It's worth the time and effort!
To bone the turkey:
Place the turkey, breast down, on a flat surface. Make an incision the entire length of the spine through the skin and flesh. Starting from the neck end and using the tip of the knife, follow as closely to the bone as you can cut, carefully teasing the skin and meat away from the frame. Toward the neck end, cut through the meat to expose the shoulder blade (feel for it first and cut through small amounts of meat at a time if you have trouble locating it); cut the meat away from around the bone and sever the bone at the joint so you can remove the blade.
Disjoint the wing between the second and third joint; free the heavy drumstick of the wing and remove it, being careful to leave the skin intact. Continue teasing the meat away from the backbone, heading toward the thighbone and being careful to keep the "oyster" -- the pocket of meat on the back -- attached to the skin instead of leaving it with the bone.
Cut through the ball-and-socket joint to release the thigh bone from the carcass; you should now be able to open the bird up more in order to better see what bones are still left to deal with. Continue teasing the meat away from the carcass until you reach the center front of the breast bone. Then very carefully separate the skin from the breast bone at the midline without piercing the skin (go slowly because the skin is very thin at this point).
Repeat the same boning procedure on the other side of the turkey, with the turkey still breast down. When both sides are finished, carefully remove the carcass. Save carcass for stock or gumbo.
Remove the thigh and leg bone on each side as follows: being careful not to break through the skin, use a small hammer to break the leg bone completely across, about two inches from the tip end. Then manipulate both ends of the bone with your hands to be sure the break is complete. Leave the tip of the bone in, but remove the leg bone and thigh bone as one unit. To do this, cut the meat away form around the thigh bone first, using the knife tip; then, holding the thigh bone up with one hand, use the other hand to carefully cut the meat away from around the leg-thigh joint. (Don't cut through this joint, and don't worry if it seems as if you're leaving a lot of meat around the joint -- it can't be helped, and besides, it will add flavor to the stock you make with the bones!)
Then use the blade of the knife to scrape the meat way from the leg bone; remove the leg-thigh bone. With your hands or the knife, one by one remove as many bin bones from the leg meat as possible. Then, if necessary, pull the tip of the leg bone to turn the meat to the inside, so the skin is on the outside and it looks like a regular turkey again. Refrigerate.
To bone the duck:
Place the duck, breast down, on a flat surface and follow the same procedures you did to bone the turkey, except this time you will remove all of the bones, instead of leaving in part of the wing and leg bones.
To bone each wing, cut off the first two joints of the wing, leaving the wing's drumstick. Cut the meat from around the drumstick and remove this bone.
When you reach the thigh, follow the thigh-leg bone with the knife blade to release the bone as one unit; again, be careful not to cut the skin.
Trim some of the excess skin and fat from around the neck area. Cut the skin in small pieces and reserve it for making the gravy. Discard the fat. Refrigerate the duck and skin pieces.
To bone the chicken:
Use precisely the same procedure to bone the chicken as you used to bone the duck.
To assemble the Turducken:
Spread the turkey, skin down, on a flat surface, exposing as much meat as possible. Sprinkle the meat generously and evenly with a total of about 3 tablespoons of the Creole seasoning, patting the seasoning in with your hands. (Be sure to turn the leg, thigh and wing meat to the outside so you can season it too.)
Then stuff some of the cold andouille dressing into the leg, thigh and wing cavities until full but not tightly packed. (If too tightly packed, it may cause the leg and wing to burst open during cooking). Spread an even layer of the dressing over the remaining exposed meat, about 1/2 to 3/4 inches thick. You should use a total of about 7 cups dressing.
Place the duck, skin down, on top of the andouille dressing, arranging the duck evenly over the dressing. Season the exposed duck meat generously and evenly with Creole seasoning, using about 1 tablespoon, and pressing it in with your hands. Then spread the cold cornbread dressing evenly over the exposed duck meat, making the layer slightly less thick than the andouille dressing, about 1/2 inch thick. Repeat with the chicken and the oyster dressing.
Enlist another person's help to carefully lift the open Turducken into an ungreased 15x11 baking pan that is at least 2-1/2 inches deep. (NOTE: this pan size is ideal because the Turducken fits snugly in the pan and stays in the proper shape while cooking).
As you life the Turducken into the pan, fold the sides of the turkey together to close the bird. Have your helper hold the turkey closed while you sew up all the openings, making the stitches about 1 inch apart. When you finish sewing up the Turducken on the first side, turn it over in the pan to sew closed any openings in the other side. Then tie the legs together, just above the tip bones. Leave the turducken to cook, breast side up, in the pan, tucking in the turkey wings.
Place the Turducken pan in a slightly larger pan with sides at least 2-1/2" deep, so that the larger pan will catch the overflow of drippings during cooking. Season the exposed side of the Turducken with about 2 tablespoons of Creole seasoning, patting it in with your hands. Refrigerate until ready to bake.
Bake the Turducken at 190°F, about 12 hours, until done, or until a meat thermometer inserted through to the center reads 165F. (NOTE -- there's no need to baste, but you will need to remove accumulated drippings from the Turducken pan every couple of hours so that the lower portion of the turkey doesn't deep fry in the hot oil. When done, remove the Turducken from the oven and let rest and cool for 1 hour. Meanwhile, make the gravy with some of the pan drippings and the reserve duck skin.
With strong spatulas inserted underneath (remember there are no bones to support the birds' structure), carefully transfer the Turducken to a serving platter and present it to your guests before carving. Be sure to make your slices crosswise so that each slice contains all three dressings and all three meats. Serve additional bowls of the dressings on the side.
SWEET POTATO EGGPLANT GRAVY
* 1/2 cup drippings from the Turducken, plus the reserved duck skin
* 4 cups eggplants, peeled and chopped
* 1-1/2 cups onions, chopped
* 1 cup sweet potatoes, peeled and finely chopped
* 1 teaspoon garlic, minced
* 3 bay leaves
* 1-1/2 teaspoons salt
* 1-1/2 teaspoons white pepper
* 1-1/2 teaspoons cayenne
* 1 teaspoon dry mustard
* 1/2 teaspoon dried thyme leaves
* 8 cups chicken stock, turkey stock or duck stock
* 1 cup dark brown sugar, packed
* 1 cup sweet potatoes, peeled and cut into 1/2" dice
* 3 tablespoons Grand Marnier
* 1/2 cup green onions, finely chopped
Place the drippings and duck skin in a large skillet over medium-high heat. Add 3 cups of the eggplant and sauté until eggplant starts to get soft, translucent and brown, about 5 minutes, stirring frequently. Add the onions and remaining 1 cup eggplant. cook until the onions start to brown, about 8-10 minutes, stirring occasionally. Add the finely chopped sweet potatoes. Continue cooking and stirring for 4 minutes. Stir in the garlic and cook 3 minutes, stirring occasionally. Add the bay leaves, 1 teaspoon of the salt, 1 teaspoon each of the white and red peppers, the mustard and thyme. Stir well, scraping the pan bottom as needed.
Stir in 1 cup of the stock into the vegetables and cook 2 minutes, then add 1 more cup of stock. Cook 5 minutes, stirring occasionally. Stir in 1/4 cup of the sugar and cook 2 minutes, stirring occasionally. Add another 1 cup of stock and cook 10 minutes, stirring occasionally. Add the remaining 1/4 cup sugar and 1 cup more stock. Cook 10 minutes, then add another 1 cup of stock and cook 10 minutes more, stirring occasionally. Reduce heat to low and simmer 13 minutes. Stir in another 1 cup stock and simmer for 3 minutes. Remove from heat and strain well, forcing as much liquid as possible through the strainer.
Place the strained gravy in a 2 quart saucepan. Add the diced sweet potatoes and 1 cup stock. Bring to a boil over high heat, then reduce heat and simmer 3 minutes, skimming any froth from the surface. Stir in the Grand Marnier and continue simmering for 7 minutes, stirring occasionally. Add the green onions, the remaining 1/2 teaspoon each of salt, white and red pepper, and the FINAL cup of stock. Bring gravy to a boil and simmer until it reduces to about 3 cups, about 8 minutes, stirring occasionally. Yield: About 3 cups.
ANDOUILLE SMOKED SAUSAGE DRESSING
* 4 tablespoons oil
* 4 cups chopped onions
* 2 cups chopped celery
* 2 cups chopped green bell peppers
* 1-1/4 pounds andouille
* 4 tablespoons butter
* 2 tablespoons sweet paprika
* 2 tablespoons garlic, minced
* 1 tablespoon Tabasco sauce
* 2 cups turkey, duck or chicken stock
* 1-1/2 cups very fine dry French bread crumbs
Place the oil in a large skillet over high heat. Add 2 cups of the onions, 1 cup each of the celery and bell pepper. Sauté until the onions are dark brown but not burned, about 10-12 minutes, stirring occasionally. Add the andouille and cook until the meat is browned, about 5 minutes, stirring frequently. Add the remaining 2 cups onions, 1 cup celery and bell pepper, the butter, paprika, garlic and Tabasco, stirring well. Reduce heat to medium and cook about 3 minutes, stirring occasionally. Stir in the stock and bring to a simmer; continue cooking until the oil rises to the top (until the water evaporates), about 10 minutes. Stir in the bread crumbs. Remove from heat.
Transfer mixture to an ungreased 8x8" baking dish; bake uncovered in a 425°F oven until browned on top, about 45 minutes, stirring and scraping pan bottom well every 15 minutes.
CORNBREAD DRESSING
Cajuns like their cornbreads and dressings sweet, so the crumbled cornbread we start with in this dish is sweet (the cornbread referenced in the link below should have the sugar increased from 1/3 cup to 2/3 cup). If you prefer less sweet dressings, you may omit the sugar entirely.
Seasoning mix:
* 4 tablespoons ground turmeric
* 2 teaspoons salt
* 1-1/2 teaspoons white pepper
* 1 teaspoon cayenne
* 1 teaspoon black pepper
* 1 teaspoon dried oregano leaves
* 1/2 teaspoon onion powder
* 1/2 teaspoon dried thyme leaves
Dressing ingredients:
* 4 ounces (1 stick) butter
* 4 tablespoons margarine
* 3/4 cup onions, finely chopped
* 3/4 cup green bell peppers, finely chopped
* 1/2 cup celery, finely chopped
* 1 tablespoon garlic, minced
* 2 bay leaves
* 3/4 pound turkey, duck or chicken giblets, boiled until tender then ground (preferred), or finely chopped
* 1 cup turkey, duck or chicken stock
* 1 tablespoon Tabasco sauce
* 5 cups finely crumbled cornbread (increasing sugar to 2/3 cup)
* 1-2/3 cups evaporated milk
* 3 eggs
Thoroughly combine the seasoning mix ingredients in a small bowl and set aside.
In a large skillet, melt the butter and margarine with the onions, bell peppers, celery, garlic and bay leaves over high heat. Sauté about 2 minutes, stirring occasionally. Add the seasoning mix and continue cooking until vegetables are barely wilted, about 5 minutes. Stir in the giblets, stock and Tabasco. Cook for 5 minutes, stirring frequently. Remove from heat. Add the cornbread, milk and eggs, stirring well. Spoon dressing into a greased 9x13" baking pan. Bake at 350°F until browned on top, about 35-40 minutes.
OYSTER DRESSING
Seasoning mix:
* 1/2 teaspoon salt
* 1/2 teaspoon garlic powder
* 1/2 teaspoon cayenne
* 1/2 teaspoon sweet paprika
* 1/2 teaspoon black pepper
* 1/4 teaspoon onion powder
* 1/4 teaspoon dried oregano leaves
* 1/4 teaspoon dried thyme leaves
Dressing ingredients:
* About 20 small to medium oysters in their liquor, about 1/2 pound
* 1 cup cold water
* 6 ounces (1-1/2 sticks) margarine
* 1-1/2 cups onions, chopped
* 1 cup celery, chopped
* 1 cup green bell peppers, chopped
* 1 teaspoon garlic, minced
* 1 cup very fine dry French bread crumbs
* 2 tablespoon unsalted butter, softened
* 1/2 cup green onions, chopped
* 1/2 cup parsley, finely minced
Combine the oysters and water; stir and refrigerate at least 1 hour. Strain and reserve oysters and oyster water, refrigerate until ready to use.
Melt 4 tablespoons of the margarine in a large skillet over high heat. When margarine is almost melted, add 3/4 cup of the onions, 1/2 cup each of the celery and bell peppers. Sauté over high heat until onions are dark brown but not burned, about 8 minutes, stirring frequently.
In a small bowl, combine the seasoning ingredients and mix well. When onions are browned, stir 2 teaspoons of the seasoning mix and the garlic into the skillet. Reduce heat to medium and continue cooking for 5 minutes, stirring occasionally. Add the remaining 3/4 cup onions, 1/2 cup celery, 1/2 cup bell peppers and 1 stick margarine, and 1/4 cup of the green onions, 1/4 cup of the parsley, and the bay leaves. Stir unti margarine is melted.
Continue cooking about 10 minutes, stirring occasionally. Stir in the remaining seasoning mix and enough bread crumbs to make a moist but not runny dressing. Remove from heat. Stir in the drained oysters. Spoon dressing into an ungreased baking pan and bake at 350°F for 30 minutes. Remove from oven, discard bay leaves and stir in the butter and the remaining 1/4 cup each green onions and parsley.
Monday, November 17, 2008
Rice
In todays post, I am going back to basics. I love rice. It's simple, nutritious,a great flavor carrier as well as being tasty on it's own. It's good for breakfast, lunch or dinner, main dishes or desserts. Today is just simple boiled/steamed rice.
Basic Rice
1 cup long grain rice
2 cups water
a dash of salt
a pot with a tight fitting lid
Place the rice, water and salt into the pot. Place over high heat and bring to a boil. Boil for a minute or so, turn down the heat to a bare simmer. Put the lid on and allow the rice to cook for about 20 minutes, or until the rice is tender and all the liquid is absorbed.
Monday, November 10, 2008
Crockpot chicken and rice with vegetables
Tonights recipe was something I just kind of threw together. I just really didn't feel like standing over my stove or oven. The Crockpot (or slowcooker) is always good for that.
Crockpot chicken and rice with vegetables
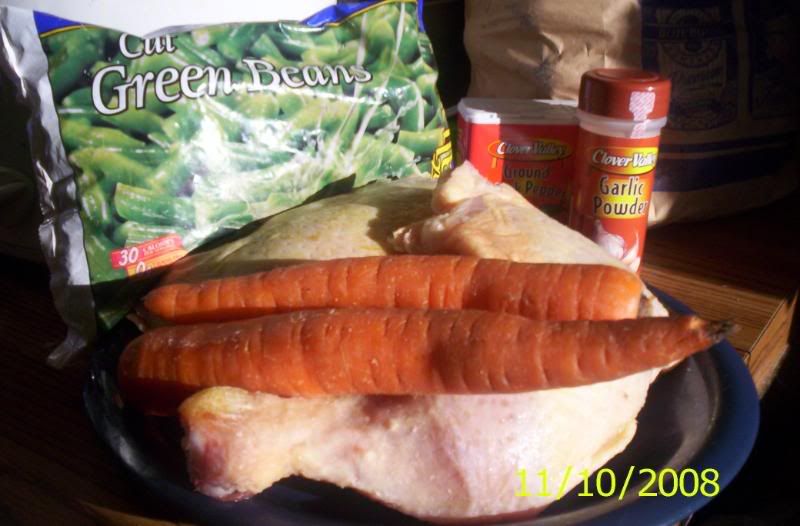
1 cup rice
1 cup green beans
2 carrots, peeled and cut into 1 inch pieces
2 stalks celery
2 chicken leg quarters
2 tablespoons oil
2 cups water
2 boullion cubes (I used tomato)
salt, pepper, garlic powder
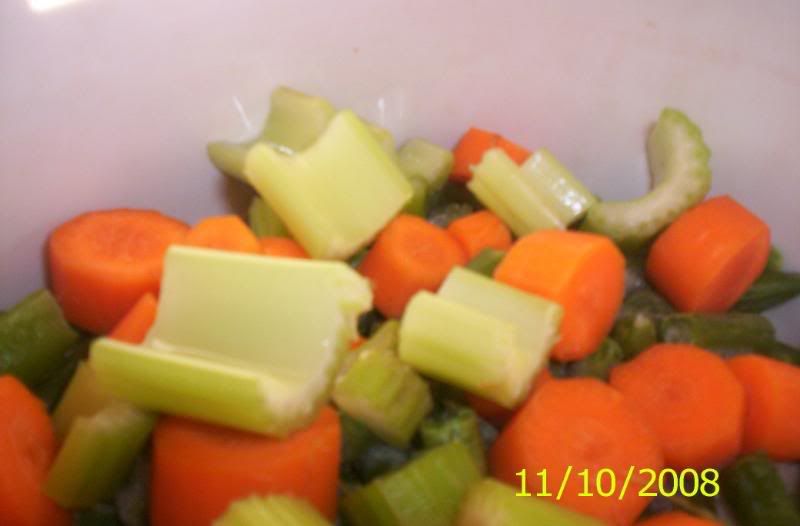
Place the rice, green beans, carrots and celery into the crockpot. Turn the crockpot on high to preheat it. You are going to be adding hot ingredients to it and if you add hot ingredients to a cold crock or vice-versa, it might crack.
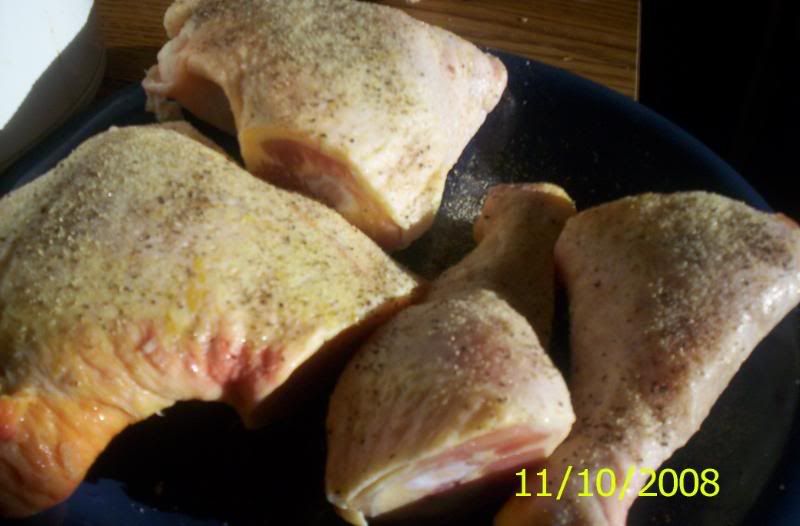 Season the chicken liberally with the salt, pepper and garlic powder.
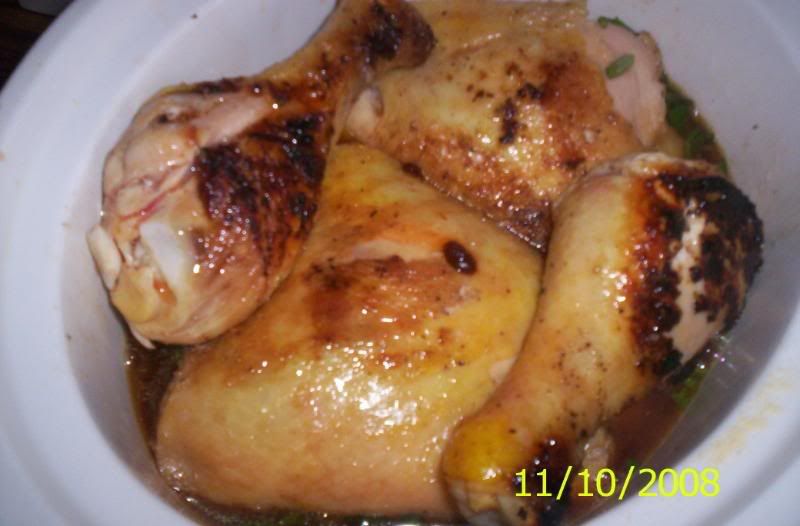 Brown in the oil. Place the chicken on top of the rice and veggies. Bing the water to a boil, and toss in the boullion cubes. Stir to dissolve. Pour over the other ingredients in the crock.Put the lid on and turn down to low. Cook for 8-10 hours. If you want it to cook faster, leave on high and it should only take 4-6 hours. I couldn't get a good picture of this, it didn't look terribly appetizing in them, but it was very good
Crockpot chicken and rice with vegetables
1 cup rice
1 cup green beans
2 carrots, peeled and cut into 1 inch pieces
2 stalks celery
2 chicken leg quarters
2 tablespoons oil
2 cups water
2 boullion cubes (I used tomato)
salt, pepper, garlic powder
Place the rice, green beans, carrots and celery into the crockpot. Turn the crockpot on high to preheat it. You are going to be adding hot ingredients to it and if you add hot ingredients to a cold crock or vice-versa, it might crack.
Season the chicken liberally with the salt, pepper and garlic powder.Brown in the oil. Place the chicken on top of the rice and veggies. Bing the water to a boil, and toss in the boullion cubes. Stir to dissolve. Pour over the other ingredients in the crock.Put the lid on and turn down to low. Cook for 8-10 hours. If you want it to cook faster, leave on high and it should only take 4-6 hours. I couldn't get a good picture of this, it didn't look terribly appetizing in them, but it was very good
Saturday, November 8, 2008
Jambalaya
Another Cajun recipe. I love Cajun food. It's kind of in my blood. These recipes are comforting to me. I think of family, home and good times. I remember my grandmother making gumbo every year for Christmas. Everybody saved their leftover turkeys from thanksgiving and we would bring them over to her. It was always the best gumbo of the year. I don't remember my grammy making jambalaya, but my mom did. Here is a quick recipe for it.
Jambalaya
2 chicken quarters
1 pound smoked sausage, sliced
2 tablespoons oil
salt
pepper
1 cup chopped onions
1/2 cup chopped green bell peppers
1/2 cup chopped celery
2 cups rice
4 cups chicken broth
Sprinkle the chicken with salt and pepper. In large pot, heat the oil. Brown the chicken in the oil. Set aside. Brown the sausage in the drippings and set aside with the chicken. Add the vegetables to the pot and sautee just until wilted. Add the rice and broth. Add the chicken and sausage back to the pot. Bring to a boil. Reduce to a simmer, cover tightly and simmer until chicken is cooked through and the rice is done. Serve hot.
Friday, November 7, 2008
EggBeater Quiche
I love quiche. Pair it with a salad and you have a great balanced meal. It's good anytime of the day, anytime of the year. Try asparagus in the spring, chunks of baked acorn or butternut squash in the fall and winter. Tomatoes and zucchini in the summer with fresh basil. Try different cheeses, although I would stick with the harder cheeses. A Swiss type cheese is always good. Meats... whatever goes! Ham, bacon, chicken (as I did here). Quiche is a great way to use leftovers.
Eggbeater Quiche
1 9 inch frozen pie shell, regular, not deepdish
1/2 cup chicken
1/2 cup defrosted, well drained (dry), frozen spinach
6 slices bacon, cooked and crumbled
1/2 cup shredded 5 italian cheese blend
3/4 cup Garden Vegetable EggBeater
1/2 cup milk (I used 2%)
Preheat oven to 350 degrees Farenheit. Prick the pie shell with a fork all over. This is called "docking". Place pie shell in preheated oven and bake until ligh golden brown, aproximately 15 minutes. This is called "blind baking". When golden brown, remove pastry from oven. Layer the chicken, then the spinach, then the bacon and lastly the cheese. You don't want to put the spinach on the bottom or the crust gets soggy. Same for the cheese. Mix the EggBeaters with the milk and gently pour over the filling. It should just reach the top of your filling. Place on a cookie or baking sheet and put in the preheated oven. Bake until golden brown on top and just set in the middle, this should take about 45 minutes. If you pie crust begins to brown to much around the edges, use a strip of foil around it and continue baking. When filling is just set, remove from oven and let it rest for 5-10 minutes. This makes it easier to slice. Cut into wedges and serve with a salad.
Gumbo
I'll tell you up front... this is NOT my gumbo recipe. I got it off of Food Network, courtesy of Emeril Lagasse. It's a very good recipe, and nearly the exact same as mine. The major difference is that I don't use file, and I add both tomatoes and okra, just one 8 oz can of tomatoes and 8 oz of frozen okra. I would also NEVER EVER use kielbasa.
Chicken and Smoked Sausage Gumbo with White Rice
recipe courtesy of Emeril Lagasse
1 tablespoon plus 1/2 cup vegetable oil
1 pound smoked sausage, such as andouille or kielbasa, cut crosswise 1/2-inch thick pieces
4 pounds chicken thighs, skin removed
1 tablespoon Essence or Creole seasoning, recipe follows
1 cup all-purpose flour
2 cups chopped onions
1 cup chopped celery
1 cup chopped bell peppers
1 teaspoon salt
1/4 teaspoon cayenne
3 bay leaves
9 cups chicken stock or canned low-sodium chicken broth
1/2 cup chopped green onions
2 tablespoons chopped parsley leaves
1 tablespoon file powder
White Rice, recipe follows
Hot sauce
In a large enameled cast iron Dutch oven or large pot, heat 1 tablespoon of the vegetable oil over medium-high heat. Add the sausage and cook until well browned, about 8 minutes. Remove the sausage with a slotted spoon and drain on paper towels. Set aside.
Season the chicken with the Essence and add in batches to the fat remaining in the pan. Cook over medium-high heat until well browned, 5 to 6 minutes. Remove the chicken from the pan, let cool, and then refrigerate until ready to use.
Combine the remaining 1/2 cup oil and the flour in the same Dutch oven over medium heat. Cook, stirring slowly and constantly for 20 to 25 minutes, to make a dark brown roux, the color of chocolate.
Add the onions, celery, and bell peppers and cook, stirring, until wilted, 4 to 5 minutes. Add the reserved sausage, salt, cayenne, and bay leaves, stir, and cook for 2 minutes. Stirring, slowly add the chicken stock, and cook, stirring, until well combined. Bring the mixture to a boil. Reduce the heat to medium-low and cook, uncovered and stirring occasionally, for 1 hour.
Add the reserved chicken to the pot and simmer for 1 1/2 hours, skimming off any fat that rises to the surface.
Remove the pot from the heat. Using a slotted spoon, remove the chicken thighs from the gumbo and place on a cutting board to cool slightly. Remove and discard the bay leaves. Pull the chicken meat from the bones and shred, discarding the bones and skin. Return the meat to the gumbo and stir in the green onions, parsley, and file powder.
Spoon rice into the bottom of deep bowls or large cups and ladle the gumbo on top. Serve, passing hot sauce on the side.
Emeril's ESSENCE Creole Seasoning (also referred to as Bayou Blast):
2 1/2 tablespoons paprika
2 tablespoons salt
2 tablespoons garlic powder
1 tablespoon black pepper
1 tablespoon onion powder
1 tablespoon cayenne pepper
1 tablespoon dried oregano
1 tablespoon dried thyme
Combine all ingredients thoroughly.
Yield: 2/3 cup
Recipe from "New New Orleans Cooking", by Emeril Lagasse and Jessie Tirsch Published by William and Morrow, 1993.
White Rice:
2 cups long-grain white rice
4 cups water, chicken stock, or canned low-sodium chicken broth
1 tablespoon unsalted butter
1 1/2 teaspoons salt
1 bay leaf
In a 2-quart saucepan, combine the rice, water, butter, salt, and bay leaf and bring to a boil over high heat. Reduce the heat to low, cover, and simmer until all the liquid is absorbed, about 20 minutes. Remove the pan from the heat and let sit, covered and undisturbed, for 5 minutes.
Uncover and fluff the rice with a fork. Discard the bay leaf and serve.
Yield: 7 cups
Prep Time: 5 minutes
Cook Time: 20 minutes
Inactive Prep Time: 5 minutes
Sunday, November 2, 2008
Making a Roux
First, you make a roux. So many of my favorite dishes from childhood start that way. Making a roux is not as hard as you might think. The most important part of making a roux is DO NOT WALK AWAY!!! Like most things, if you burn a roux, you'll have to toss it and start all over again, so watch it carefully. It should be stirred occasionally to promote even coloring and prevent scorching, about every 15 seconds or so. How much roux should you make? Well, that depends a lot on taste and how thick you like your liquid. Make more roux than you think you'll need and simply set some aside. You can always add roux, but you can't take it out. I usually use a 1 to 1 ratio of fat to flour, but if you're a beginner, use a 2 to 1 ratio of fat to flour. This will help prevent the roux from burning. Once you get the hang of roux, you can decrease the fat. How long should you cook a roux? Again, it depends on taste. It also depends on what you're making. For gumbo, you'll want a dark, or "brick" roux. If you're making a cheese sauce, you'll want a light, or "blonde" roux. You'll also want to use butter for a cheese sauce, not shortening. A brick roux adds not only color, but a certain distinctive flavor to the dish. So... go make a roux, better yet... make gumbo!
Saturday, November 1, 2008
Apple Butter
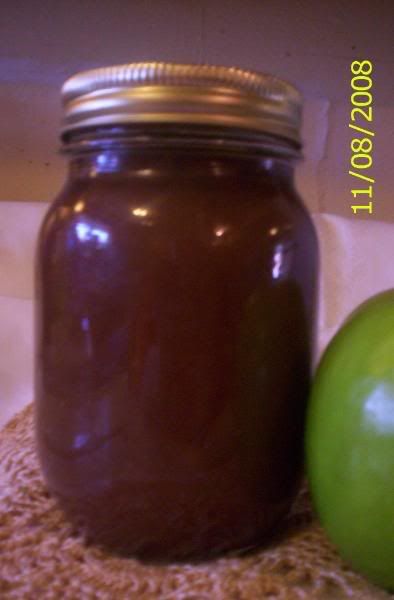
I love canning. The idea and process of canning makes me feel secure and productive. Apple butter is one of my favorite things to make and can in the fall. The following is my favorite recipe for apple butter and I have been known to sit and eat it straight out of the jar. If you want good directions on canning try one of these sources. Southern Plate has a great tutorial, with music and step by step tutorial. I would highly recommend a book on canning and preserving as well. Check with your local Cooperative extension, you can find the one closest to you here. Another excellent resource is Ball, they are one of the largest producer of a type of jar called a Mason Jar (some of us, ok, ALOT of us, in the south use old mason jars as "everyday" glasses for our "swee'tea"). Now, on to the recipe!
Apple Butter
2 pounds apples
juice of 1 lemon
1 cup apple cider vinegar
1 cup apple juice or cider
Apple Pie spice to taste
1 pound of sugar
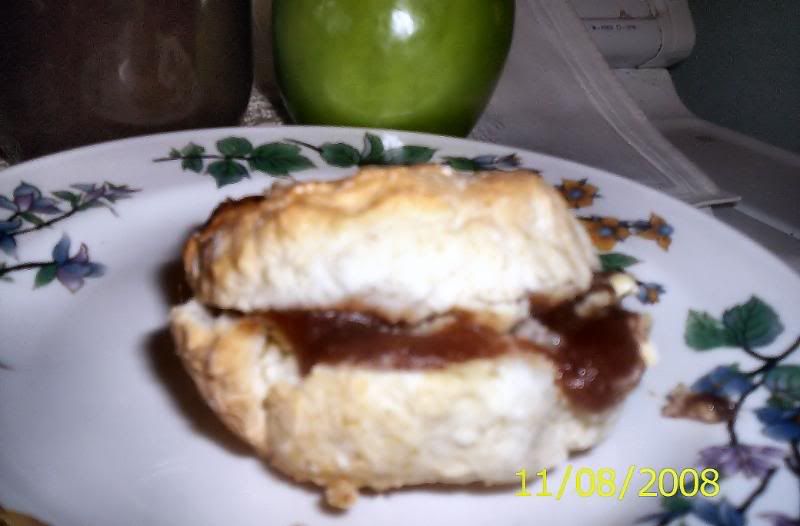
Peel, core and chop the apples. Place in a non reactive pot with the lemon juice, vinegar, and juice. Bring to a boil and cook until apples are soft and mushy and the liquid has mostly evaporated. Add the sugar and stir until it is dissolved. Puree in a blender or processor to a smooth consistency, you may have to do this is batches. If you have one, I highly recommend using a stick blender, just makes this step easier. Return to the pot and cook until very thick. Add the pie spice. Pour into sterilized jars, seal/process and label. Make sure to put not only the name of the product, but the day it was canned. It's fabulous on biscuits!
Wednesday, October 29, 2008
Bean Night
It's Wednesday, which means it's bean night at my house. I like cooking beans, they are an incredibly versatile and nutritious food. They are also incredibly cheap. Following is one of my favorite recent creations. I will not claim that it is a new or terribly original idea. Truth is, none of my recipes/cooking ideas are. But, I hope that my inspirations will also inspire you. Anyway, here it is:
White Bean Chili
1/2 pound white beans
2 boneless, skinless chicken thighs, cut into chunks
2 teaspoons oil
1 poblano chile pepper*, minced
1 Anaheim chile pepper*, minced
1 bell pepper, minced
1 onion. diced
4 cloves garlic, minced fine/crushed
chicken broth
salt and pepper to taste
Pick through the beans for shriveled beans, odd beans and small rocks, dirt etc. Soak the white beans in 2 quarts of water overnight. Drain and rinse. Set aside. In a non reactive pot, heat the oil over medium heat. Add chicken and sautee unil it begins to brown. Add in the vegetables and sautee until wilted. Add in the beans and enough chicken stock to cover by 2 inches. Bring to a brisk boil and boil for 10 minutes. Cover with a tight fitting lid and reduce to a simmer. Cook until beans are tender, stirring occasionally and adding stock as needed. Taste for salt and pepper and add as needed.
*If you would like a hotter chili, use a hotter pepper.
Monday, October 27, 2008
Pickled Pears
2 Pounds of pears, peeled, cored, and cut into approximately 1 inch chunks.
1 cup light brown sugar
1 12oz bottle of red wine vinegar
water
red food coloring (optional)
Place the pears, sugar and vinegar into a non-reactive pot. Add water to just barely cover. Add a few drops red food coloring. Bring to a boil and cook for 10 minutes, stirring occasionaly, being careful not to break up the pears. They should be crisp/tender. Remove from heat and allow to steep until cool. Remove pears from liquid. Bring liquid to a boil and reduce to a thin syrup. Pour over the pears while still hot. Place in a non-reactive container, cover and refrigerate.
Friday, October 24, 2008
Chili!
It's a yucky dreary day here in southern Tennessee, so I'm making chili. Want the recipe? Here it is!
Jalera's Chili
1/2 pound of beans (I like pintos, but any kind will do)
1 quart of water
1 teaspoon salt
2 cans diced tomatoes
1 pound ground meat (turkey, pork, beef, whatever you like)
2 tablespoons chili powder
1 onion, diced
4 cloves garlic, minced
1 boullion cube
Place beans in a large, non-reactive pot. Cover with the water and add the salt. Bring the beans to a boil. Boil for 10 minutes. Reduce heat to low and simmer until beans are tender. Add water as necessary. When the beans are done, drain and rinse. Brown the ground meat, add the onions and garlic and sautee until transparent. Stir in the canned tomatoes, the chili powder, the boullion cube and the drained beans. Add water to cover. Bring to a boil then reduce to a simmer. Cook for 1 hour, stirring occasionally to prevent sticking. Serve hot with cheese, chopped onion and crackers.
Sunday, October 19, 2008
October
I love October, it's my favorite month. The leaves are at their peak color, the weather is crisp and cool, the sky is that perfect shade of blue. It's also halloween... probably the best holiday ever. When else can you go door to door begging for candy and not get in trouble for it? Makes me wish I were a kid again! Of course it also makes me wish I were thinner, so that I can wear the sexy, cool, neat costumes instead of wearing an orange t-shirt and going as the Great Pumpkin.... again. Ah well.
Friday, October 17, 2008
My neighborhood.
I currently live in Federally Subsidized Housing, also known as "The Projects". It's not to bad. I hate the lack of privacy. It's a little noisy. Occasionaly there is a shooting. But the crime is generally from people who don't live here. I have a nice front patio, that I share with my neighbor and an okay back porch that I also share with my neighbor (my dwelling is a duplex.). This past summer I grew a small container garden on my back porch. I grew 2 different tomatoes, an eggplant, bell peppers, and zucchini. The tomatoes did really well. I was very pleased with the heirloom variety, Mr. Stripey, it was a wonderfully sweet and flavorful tomato. It was also a really pretty tomato. It's color was a pinky red with orangey yellow stripes. These tomatoes generally didn't make it into the house. I ate them before they made it that far and I will be growing these again next year. The eggplant was also really good. It was a really nice japanese variety, which I had never had. It had a wonderfully firm and sweet flesh with a beautiful purple skin. I also plan on growing these again.
Mom's Veggie soup
In reference to the previous post, my mom makes the best homemade veggie soup. It's not so much a soup as a pot of mixed vegetables with a little broth. It's great on cold days and one of my favorite things she makes. So here is a quick recipe.
1 head of green cabbage, chopped
1 10 oz bag of frozen corn
2 large cans of tomatoes ( I like whole)
1 10 oz bag of mixed vegetables
2 large onions chopped
4 large cloves of garlic, minced
water or broth
Throw everything into the largest pot you have, add just enough water or broth to come to the top of the vegetables. Bring to a boil. Reduce the heat to a low simmer, put a lid on it. Cook for aproximately one hour, or until vegetables are tender. Serve steaming hot with homemade bread, cornbread or biscuits.
You can add whatever vegetables you have to this. When it's on sale or we can afford it, mom throws some cubed up beef that has been browned into it. Chicken and ground meat is also good.
Wednesday, October 15, 2008
Cornbread Biscuits
Woohoo! My first posted recipe. I kinda made this up the other night to have with my moms homemade beef vegetable soup. Forgive me if you try this and it doesn't quite work for you, I tend to eyeball things, even when I bake. I will try to post some pics soon.
Jalera's Cornbread biscuits
1 cup baking/biscuit mix
1 cup self rising cornmeal mix
1/4 cup buttermilk
Preheat oven to 400 degrees F. Lightly oil a baking sheet. Mix the dry ingredients together, rubbing out lumps. Add liquid and stir until mixed. Drop mixture by spoonfuls onto a lightly oiled pan. Place on middle rack of oven and bake for 10-12 minutes or until lightly browned.
My First Blog
Ok, so this is my first blog. I've never blogged before. I've never considered myself a very good writer, I tend to be a very stream of concious writer. I write it as it comes into my head. . The title of this blog is Jal's Kitchen. Why that name? Well... I have no idea. Maybe it's because some of the best conversations I've had have always been around a table. Be it a restaurant table, a picnic table or... the kitchen table. It could also be because I love to cook and plan on sharing recipes, food obeservations and general food ideas. I'm a fat girl (or BBW if you prefer), a foodie and a southern, cajun girl. Offended by the word girl? Prefer if I use the word woman? To bad, go somewhere else. I can be offensive, opiniated and bitchy.
Subscribe to:
Posts (Atom)